IgorShare Thoughts and Ideas

Consulting and Training

Archive for the ‘.NET’ Category

Roslyn: C# is cheating on me with JavaScript (or how to compile C# into JavaScript)

Posted by Igor Moochnick on 08/20/2012

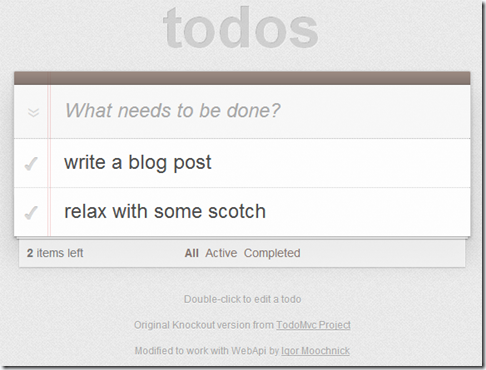
imageWhile working extensively on development of the Single Page Applications (SPA) I was facing a fact that my server-side data models were evolving quicker than their JavaScript counterparts. Both the client-side and the server-side data models were getting quickly out of sync.

The brute force solution of using the T4 templating engine to emit both the client-side and the server side data models didn’t look that appealing to me. Primarily due to a simple fact that it’s not that easy to refactor the T4 templates. And, the ReSharper junkie like me, can’t tolerate this fact.

So I’ve decided to give the latest release of Roslyn compiler-as-a-service CTP another spin and use it as part of my build sequence and compile my C# models directly into the appropriate JavaScript ones. This was giving me the advantage of using the C# as a primary development environment and leaving the JavaScript to follow the “big-brother”.

Jinx C#-to-JavaScript compiler was created as a result of this exercise. You’re welcome to get the Jinx source from the GitHub. I’ll appreciate any collaboration on this project.

Note: all of the code is an intermediate solution that was answering my personal needs for the project I was running. It is in no-way represent the full fledge solution. If you want something bigger and more feature-reach, you can either contribute to my solution or look into projects like Script# or SharpKit.

Read the rest of this entry »

Posted in Architect, C#, Compiler, Javascript, Tutorials, Web | 3 Comments »

Controlling TopShelf via REST interface + Dashboard

Posted by Igor Moochnick on 04/11/2012

My recent update for the TopShelf enables the new Nancy-based REST interface and provides improvements to the current dashboard.

The new REST interface allows you to see what are the currently running services by sending a GET request to the dashboard URL (i.e. http://dasboard_url/services).

As a reply, you’re going to get a JSON block that contains small snippets of information about each seevice and shelf that is running inside the TopShelf process.

[...
   {
      "Name":"clock",
      "ServiceType":"Shelf",
      "CurrentState":"Running",
      "Action":"stop"
   }
...]

The most important piece of the block above is the URL-encoded Name of the service. You can use this name as an ID to control the service’s lifetime via HTTP GET requests, i.e.: start, stop, unload:

  • /service/{name}/start
  • /service/{name}/stop
  • /service/{name}/unload

The latest addition to the control interface is the ability to upload shelves remotely by uploading a ZIP file with all the relevant bits of your service.

You can do the upload via the dashboard by navigating to the ZIP package or by dragging and dropping the shelf archive onto a designated area.

In addition, you can do it programmatically via file upload POST request. This sounds complicated, but, in fact, if you’re using .Net framwork, it may look as simple as this:

using (WebClient client = new WebClient())
{
     client.UploadFile("http://localhost:8087/service/upload", @"C:\Packages\clock.zip");
}

All the above functionality can be configured and fine-tuned via the new optional configuration settings that you can put in the TopShelf host configuration file:

<appsettings>
	<add key="ServicesLocation" value="Services" />
	<add key="DashboardUri" value="http://localhost:8087" />
	<add key="DashboardUploadsEnable" value="true" />
	<add key="DashboardUploadsPackageFolder" value="Packages" />
</appsettings>

Here is a short explanation of the settings:

  • Services – contains a full or relative path of the shelves folder
  • DashboardUri – defines a Uri (ip and port) that the dashboard module (and REST web service) will use to listen to the incoming requests
  • DashboardUploadsEnable – this value controls if the uploads of the shelves are enabled (both through the dashboard and the REST service)
  • DashboardUploadsPackageFolder – defines a temporary location where the ZIP archives of the shelves will be stored before unpacked into the shelves location (defined by the Services setting)

Posted in .NET, REST | 2 Comments »

Adding Nancy to the existing ASP.NET MVC site

Posted by Igor Moochnick on 04/08/2012

There is an issue adding Nancy to the ASP.Net MVC site due to a simple fact that MVC controls the routes not through the web.config but through the routing table.

If you adding Nancy to the existing MVC site – make sure to remove the sub-route that controlled by Nancy from the routing table.

Here how it works:

1. Follow all the steps from the Nancy Documentation Wiki

2. Add your module and make sure that it has an “offset” path (via inheritance)

public Module() : base("/nancy")
{
   ...
}

3. Remove the “nancy” route from the Routing table in the Global.asax.cs

MvcApplication.RegisterRoutes(...)
{
   ...
   routes.IgnoreRoute("nancy/{*pathInfo}");
   ...
}

Posted in C#, Web | 5 Comments »

Interactive Data Dependency Visualizations

Posted by Igor Moochnick on 03/01/2012

There is nothing aids better in understanding your data than a great visualization. Today there is an abundance of different techniques and tools, but today I’d like to show what is readily available for you in .Net.

Let’s take a simple example of understanding dependencies between your assemblies.

If you’re running in a Visual Studio and you have a full access to the source code, it is possible to see the referenced assemblies but it’s pretty hard to track what assembly depend on the assembly you’re working on. [Note: if you’re really in need of a ready made tool for this purpose, you can check the “Architecture Tools” for Visual Studio 2010 or NDepend tool]

A visualization like this is priceless:

image

On this graph you can see a graph of the assemblies dependencies for the Paint.Net. The snapshot above highlights the dependencies of the PaingDotNet.SystemLayer (highlighted in blue) by showing all the assemblies it depends on in “yellow” and all the assemblies dependent on it in “green”. The rest is left in a “gray” color.

Let’s see how you can create interactive dependency graphs for your data.

In my case I chose to use the QuickGraph module from CodePlex that can be download from NuGet [PM> Install-Package QuickGraph]. It provides a very simple yet robust API that allows you to create the directional and non-directional graphs in memory and then save them in different formats.

Here is a small example of how to create 2 vertices (V1 and V2) and a directional edge (from V1 to V2):

var graph = new AdjacencyGraph();
graph.AddVertex("v1");
graph.AddVertex("v2");
var edge = new TaggedEdge("v1", "v2", "depends");
graph.AddEdge(edge); 

As soon as all the graph is created it can be serialized, for example, in a GraphML standard format like this:

using(var xwriter = XmlWriter.Create(...))
    g.SerializeToGraphML(xwriter);

This is it. GraphML files can be opened by a range of different tools, but, if you’d like to show these visualizations in your WPF applications you can use a Graph# from CodePlex.

Here is a sample WPF application rendering a GraphML dependency graph:

image

As you can see, you don’t have to be afraid of interactive data visualizations but you can make your applications shine and provide useful and easily digestible information for your users.

Note: Source code for this article you can download …here from the Git repo…

Posted in C#, Reflection | 4 Comments »

NWT – .Net Web Toolkit

Posted by Igor Moochnick on 10/26/2011

Now, after waiting for quite some time, we finally can implement the real solution for .Net <-> javascript conversion and bridge the impedance gap in the projects that heavily rely on the powerful rich web UI.

Currently we have solutions like Script# and CofeeScript and others. The pros in cons of these systems have been discussed countless times (ex: HanselminutesJavaScript is Assembly Language for the Web: Semantic Markup is Dead! Clean vs. Machine-coded HTML).

With the recently released project Roslyn (or alternatively Mono Compiler Services) it is possible to have a clean solution to the problem:  I write my data and data model in a language and an environment that allow solid validation and refactoring.

I’m ironing out some kinks in my implementation and, as soon as it’ll be in a stable state, I’m going to release a NWT (NeWT) project that will provide a similar to GWT (Google Web Toolkit) functionality.

Posted in C#, GWT, Javascript, jQuery, Web | 1 Comment »

Topmost Floating Status Window (with animation on mouse hover)

Posted by Igor Moochnick on 05/30/2011

Sometimes an app needs an indication of it’s activity to be visible to the user at all times. We already have one mechanism – a tray icon. It’s a well-known and a well-documented trick.

Recently more and more apps are starting to show their activity with the top-most floating windows that are sliding into the view when needed. I see a reason to, sometimes, use this trick but I passionately condemn the implementation where a user (me specifically) can’t move this window out of the way where it overlaps with other notifications or the apps that I’m working with (like Skype or WebEx screen sharing for example).

Below is a small WPF XAML sugar that can allow you to have such a floating window, but, please, make sure a user can drag it out of the way or choose (in the settings?) on what side of the screen he want’s this window to doc. If time permits, I’ll post this information later.

<Window x:Class="JiveHub.Windows.FloatWindow"
        Name="ThisFloatWindow"
        xmlns="http://schemas.microsoft.com/winfx/2006/xaml/presentation"
        xmlns:x="http://schemas.microsoft.com/winfx/2006/xaml"
        Title="FloatWindow" Height="70" Width="100" Top="-70" WindowStyle="None" Topmost="True" BorderThickness="0" AllowsTransparency="True" Background="Transparent">
    
    <Window.Resources>
        <Storyboard x:Key="EmergeWindow">
            <DoubleAnimation Storyboard.TargetName="ThisFloatWindow"
                                     Storyboard.TargetProperty="(Canvas.Top)" To="-20" Duration="0:0:1">
                <DoubleAnimation.EasingFunction>
                    <ElasticEase Oscillations="2" EasingMode="EaseOut" Springiness="3"/>
                </DoubleAnimation.EasingFunction>
            </DoubleAnimation>
        </Storyboard>
        <Storyboard x:Key="ShrinkWindow">
            <DoubleAnimation Storyboard.TargetName="ThisFloatWindow"
                                     Storyboard.TargetProperty="(Canvas.Top)" To="-50" Duration="0:0:1" BeginTime="0:0:2">
                <DoubleAnimation.EasingFunction>
                    <ElasticEase Oscillations="2" EasingMode="EaseOut" Springiness="3"/>
                </DoubleAnimation.EasingFunction>
            </DoubleAnimation>
        </Storyboard>
    </Window.Resources>

    <Window.Triggers>
        <EventTrigger RoutedEvent="Window.Loaded">
            <BeginStoryboard>
                <Storyboard>
                    <DoubleAnimation Storyboard.TargetName="ThisFloatWindow"
                                     Storyboard.TargetProperty="(Canvas.Top)" To="-50" Duration="0:0:1" >
                        <DoubleAnimation.EasingFunction>
                            <ElasticEase Oscillations="2" EasingMode="EaseOut" Springiness="3"/>
                        </DoubleAnimation.EasingFunction>
                    </DoubleAnimation>
                </Storyboard>
            </BeginStoryboard>
        </EventTrigger>
        <EventTrigger RoutedEvent="Window.GotFocus">
            <BeginStoryboard Storyboard="{StaticResource EmergeWindow}">
            </BeginStoryboard>
        </EventTrigger>
        <EventTrigger RoutedEvent="Window.MouseEnter">
            <BeginStoryboard Storyboard="{StaticResource EmergeWindow}">
            </BeginStoryboard>
        </EventTrigger>
        <EventTrigger RoutedEvent="Window.LostFocus">
            <BeginStoryboard Storyboard="{StaticResource ShrinkWindow}">
            </BeginStoryboard>
        </EventTrigger>
        <EventTrigger RoutedEvent="Window.MouseLeave">
            <BeginStoryboard Storyboard="{StaticResource ShrinkWindow}">
            </BeginStoryboard>
        </EventTrigger>
    </Window.Triggers>
    
    <Grid>
        <Border Background="Green" CornerRadius="0,0,5,5" />
    </Grid>
</Window>

Posted in Tutorials, WPF | Leave a Comment »

Tip: Showing a Main view as a tray app with Caliburn.Micro

Posted by Igor Moochnick on 03/31/2011

The trick here is to make sure that the main view doesn’t pop-up right away in a visible form. After creation and resolving all the binding rules – the main view should be in a Hidden form.

This can easily be achieved with customizing the WindowManager by sub-classing it and adding one extra method:

[Export]
public class CustomWindowManager : WindowManager
{
    public Window MainWindow(object rootModel, object context = null)
    {
        return CreateWindow(rootModel, false, context);
    }
}

As soon as you’ll have the new WindowManager – the logic for the root view creation in the Boostrapper should be adjusted accordingly:

protected override void DisplayRootView()
{
    var viewModel = IoC.Get<IShell>();

    var windowManager = IoC.Get<CustomWindowManager>();

    _mainWindow = windowManager.MainWindow(viewModel);
    _mainWindow.Hide();
}

Here is a simple ShellView that uses a WPF TrayIcon implementation from CodeProject:

<UserControl ...
             xmlns:tb="clr-namespace:Hardcodet.Wpf.TaskbarNotification;assembly=Hardcodet.Wpf.TaskbarNotification"
             xmlns:cal="http://www.caliburnproject.org"
             Visibility="Hidden">
    <Grid>
        <tb:TaskbarIcon
            Visibility="Visible"
            x:Name="MyNotifyIcon"
            IconSource="/Resources/Images/Bulb.ico"
            MenuActivation="LeftOrRightClick" PopupActivation="DoubleClick">
            <!-- Set a simple context menu  -->
            <tb:TaskbarIcon.ContextMenu>
                <ContextMenu>
                    <MenuItem Header="Exit" cal:Message.Attach="AppExit" />
                </ContextMenu>
            </tb:TaskbarIcon.ContextMenu>
        </tb:TaskbarIcon>
    </Grid>
</UserControl>

The View Model for this view is very straight forward:

[Export(typeof(IShell))]
public class ShellTrayViewModel : Screen, IShell
{
    public void AppExit()
    {
        Application.Current.Shutdown();
    }
}

That’s it.

Posted in .NET, C#, Caliburn, MVVM, WPF | 5 Comments »

Tip: opening a MessageBox in Caliburn

Posted by Igor Moochnick on 03/27/2011

While working with Caliburn V2 I’ve noticed that there is no default View for the message box. It was a bumpy road figuring out how to add one but I’ve learned a lot.

In this post you can see my solution for this challenge, but the flexibility of the framework allows multiple solutions and you may come up with a different one.

The result of this exercise look like this:

image

In my case I wanted to warn the user during the Screen closure if the changes have not been saved. The usual place to hook the check is in “CanClose” method:

public override void CanClose(Action<bool> callback)
{
    if (HasChanges)
    {
        var result = Show.MessageBox("Current item was not saved. Do you really want to close it?",
            "Question", new[] { Answer.Ok, Answer.Cancel });

        result.Completed += (s, e) => callback(result.Answer == Answer.Ok);

        result.ExecuteWithDefaultServiceLocator();
    }
    else
    {
        callback(true);
    }
}

public static class Extensions
{
    public static void ExecuteWithDefaultServiceLocator(this IResult result)
    {
        result.Execute(new ResultExecutionContext(IoC.Get<IServiceLocator>(), null, null));
    }
}

Notice that the result of the “Completed” callback from the MessageBox is used to raise the callback reply for the “CanClose” method.

When I ran the application I’ve received an error from Caliburn that the “QuestionDialogView” was not found. After checking the source I’ve noticed that the View, in fact, is not there. I had to create one. This is my simplified take on the view:

<UserControl ...>
<Grid x:Name="LayoutRoot">
    <Grid.RowDefinitions>
    	<RowDefinition/>
    	<RowDefinition Height="40"/>
    </Grid.RowDefinitions>
    <ContentControl x:Name="FirstQuestion" Grid.Row="0">
        <ContentControl.ContentTemplate>
            <DataTemplate>
                <TextBlock x:Name="Text" Text="{Binding Text}" TextWrapping="Wrap" Style="{StaticResource DefaultTextBlockStyle}" />
            </DataTemplate>
        </ContentControl.ContentTemplate>
    </ContentControl>            
    <ItemsControl x:Name="Buttons" Grid.Row="1" HorizontalAlignment="Right" Margin="0,10,0,0">
        <ItemsControl.ItemTemplate>
            <DataTemplate>
                <StackPanel Orientation="Horizontal">
                    <Button Content="{Binding Content, Converter={StaticResource upperCase}}" cal:Message.Attach="{Binding Action}" Width="70" />
                </StackPanel>
            </DataTemplate>
        </ItemsControl.ItemTemplate>
		<ItemsControl.ItemsPanel>
			<ItemsPanelTemplate>
				<StackPanel Orientation="Horizontal" />
			</ItemsPanelTemplate>
		</ItemsControl.ItemsPanel>
    </ItemsControl>
</Grid>
</UserControl>

After the view was defined – it had to be registered in the IOC to be found. This is how I did it in the bootstrapper:

            builder.With.PresentationFramework()
                .Using(x => x.ViewLocator<DefaultViewLocator>())
                    .Configured(x => x.AddNamespaceAlias("Caliburn.ShellFramework", "MyProject.Common.Views"))

BTW: in the following article you can find a full View definition for the MessageBox. When I’ve replaced my XAML with the XAML from this article – I’ve received exactly the same result:

http://caliburn.codeplex.com/wikipage?title=ISupportCustomShutdown

Posted in .NET, Caliburn, IOC/DI, MEF, MVVM, Tutorials | Leave a Comment »

Office Applications via Prism of Unity

Posted by Igor Moochnick on 03/19/2011

This article was submitted to the MSDN magazine for publication 2 years ago. It wasn’t published due to budget cuts in the magazine and my small disagreement with Glen Block on the way I’ve used the bootstrappers. Glen was busy this time with MEF and we didn’t have time to resolve our differences.

So, for what it worth, it’s a great article and helped me and my teams in a lot of ways.

Now you’ll be the judge of that if you’ll keep on reading.

This article discusses:

  • VSTO – Visual Studio Tools for Office system
  • Prism v2 – December 19 drop 8 – Composite Application Guidance for WPF and Silverlight
  • Unity Application Block 1.2 – October 2008 drop
  • WPF
  • Visual Studio 2008 Sp1
  • Introduction

    Adding integration with Office suite was always a sweet fruit that only the daring people were willing to touch. This is mostly due to a different development model that the Office suite demands – you have to specifically target your functionality to work with Office applications and develop it separately from your main application. Office integration is based on COM knowledge. At the beginning, it was hard to wrap your head around the Office COM object model, but, with the release of the VSTO (Microsoft Visual Studio Tools for Office System), it became much easier to develop the integration for the .NET applications. The use of VSTO PIA (Primary Interpol Assemblies) makes it easier but does not change the paradigm very much: it is still necessary to develop separate application components that integrate into the Office suite. Until today, it has been hard to reuse and integrate parts of a primary product with the Office suite. We need a way to create GUI applications that can be easily decomposed into separate parts and components, and re-hosted in different ways and configurations. In other words: we need a way to create composite GUI blocks that can be hosted by Office applications and Windows applications equally.

    Note that the biggest benefits of creating composite applications in general, and for Office suite in particular, are maintainability and testability. Your components can be developed separately from each other by distributed teams and tested outside of the Office applications while maintaining high quality levels of the code. This greatly reduces the complexity of the development process.

    The Office Suite applications are, by nature, composite ones. They consist of a lot of different parts and services that have to intercommunicate and coexist in a common environment. Let us take Outlook as an outstanding example. It consists from many different parts, like folder trees, explorers (folder views), inspectors (item views), ribbons, form regions, configuration tabs, etc. All of those components have to be loaded, initialized and composed in a certain way. And do not forget that, after they are loaded, they have to communicate with each other and change their views and representations in reaction to the changes in the state of their peers.

    Let us see a simplified workflow of what happens when we change an active folder in Outlook to another one:

  • A new folder is selected in a folder tree
  • Toolbar is updated to enable or disable actions that are allowed in the selected folder
  • An active Explorer clears its current items list and populates it with the list of items from the new selected folder
  • A first item in the list is automatically selected, which causes the explorer to:
  • Update the toolbar to reflect actions that can be applied to the selected item
  • Locate an appropriate inspector that knows how to render the selected item and render it in an adjoined pane (to the explorer)
  • Locate the appropriate form regions that are associated with the selected item, create appropriate custom task panes and render them
  • Note how complex the described workflow is, and adding your own functionality into it brings certain challenges.

    Outlook is not alone in this case – all the other applications from the Microsoft Office Suite, in their own different contexts, have similarly complex workflows. All of them have menu bars, ribbons tool bars, panes, regions, etc. This leads us to the question: is there a way to solve these different complexities in a common way? The answer is Yes!

    Recently released Prism (i.e. the Composite Application Guidelines for WPF) is a perfect candidate to untangle such a tight logic knot and help us create simple composite applications that can play nicely with the applications from the Office suite. It describes how we can create composite applications from modular blocks and assemble then however we need. Furthermore, this broadens the horizons of the hosting solutions. This article will take you step by step through the implementation of an application that can be executed equally as a standalone or as a hosted one. We will see how it can be hosted within an Office application as well.

    Read the rest of this entry »
    Posted in Composite Applications, Office API, Prism, Tutorials, Unity, VSTO, WPF | 2 Comments »

    Teaching TFS custom activity to work with the Svn, Cvs, Git and other source control command line tools

    Posted by Igor Moochnick on 12/27/2010

    After the SharpSvn fiasco (described in the previous post), I’ve decided temporarily put this dependency loading issue aside and, instead of running native Svn client, to use one of the command-line Svn interfaces. I’ve tried to keep the activity interface generic enough so you can configure it to use any of the available command-line source control clients (not only Svn but Cvs, Git, Mercurial, etc…)

    As a first step the following 4 common and mostly changed parameters were identified:

    1. Source location (usually a Url)
    2. Destination for check-out
    3. Username
    4. Password

    This list defined all the input parameters for the Svn custom activity (plus extra one that carries the the command line template):

            [RequiredArgument]
            public InArgument<string> SvnToolPath { get; set; }
    
            [RequiredArgument]
            public InArgument<string> SvnCommandArgs { get; set; }
    
            [RequiredArgument]
            public InArgument<string> DestinationPath { get; set; }
    
            [RequiredArgument]
            public InArgument<string> SvnPath { get; set; }
    
            [RequiredArgument]
            public InArgument<svncredentials> SvnCredentials { get; set; }

    The rest of the activity takes care of building a command line from a provided template by replacing the placeholders with the provided parameter values and executing the external process:

    namespace SvnActivityLib
    {
        [BuildActivity(HostEnvironmentOption.All)]
        [BuildExtension(HostEnvironmentOption.All)]
        [Designer(typeof(SvnActivityDesigner))] 
        public sealed class SvnActivity : CodeActivity
        {
            [RequiredArgument]
            public InArgument<string> SvnToolPath { get; set; }
    
            [RequiredArgument]
            public InArgument<string> SvnCommandArgs { get; set; }
    
            [RequiredArgument]
            public InArgument<string> DestinationPath { get; set; }
    
            [RequiredArgument]
            public InArgument<string> SvnPath { get; set; }
    
            [RequiredArgument]
            public InArgument<svncredentials> SvnCredentials { get; set; }
    
            protected override void Execute(CodeActivityContext context)
            {
                TrackMessage(context, "Starting SVN action");
    
                string destinationPath = context.GetValue(this.DestinationPath);
                string svnPath = context.GetValue(this.SvnPath);
                string svnToolPath = context.GetValue(this.SvnToolPath);
                string svnCommandArgs = context.GetValue(this.SvnCommandArgs);
                SvnCredentials svnCredentials = context.GetValue(this.SvnCredentials);
    
                string svnCommand = Regex.Replace(svnCommandArgs, "{uri}", svnPath);
                svnCommand = Regex.Replace(svnCommand, "{destination}", destinationPath);
                svnCommand = Regex.Replace(svnCommand, "{username}", svnCredentials.Username);
                TrackMessage(context, "svn command: " + svnCommand);
    
                // Never reveal the password!
                svnCommand = Regex.Replace(svnCommand, "{password}", svnCredentials.Password);
    
                if (File.Exists(svnToolPath))
                {
                    var process = Process.Start(svnToolPath, svnCommand);
                    if (process != null)
                    {
                        process.WaitForExit();
                        process.Close();
                    }
                }
    
                TrackMessage(context, "End SVN action");
            }
        }
    }

    To provide a nice UI element with the Svn logo, a custom designer was added (note the “Designer” attribude on top of the SvnActivity class). Here is the designer’s XAML:

    <sap:ActivityDesigner x:Class="SvnActivityLib.SvnActivityDesigner"
        xmlns="http://schemas.microsoft.com/winfx/2006/xaml/presentation"
        xmlns:x="http://schemas.microsoft.com/winfx/2006/xaml"
        xmlns:sap="clr-namespace:System.Activities.Presentation;assembly=System.Activities.Presentation"
        xmlns:sapv="clr-namespace:System.Activities.Presentation.View;assembly=System.Activities.Presentation" 
        xmlns:d="http://schemas.microsoft.com/expression/blend/2008" 
        xmlns:mc="http://schemas.openxmlformats.org/markup-compatibility/2006" 
        Collapsible="False" 
        ExpandState="False" 
        UseLayoutRounding="False" 
        d:DesignHeight="22" d:DesignWidth="200" mc:Ignorable="d">
        <sap:ActivityDesigner.Icon>
            <DrawingBrush>
                <DrawingBrush.Drawing>
                    <ImageDrawing>
                        <ImageDrawing.Rect>
                            <Rect Location="0,0" Size="16,16" ></Rect>
                        </ImageDrawing.Rect>
                        <ImageDrawing.ImageSource>
                            <BitmapImage UriSource="Resources\Subversion.png" ></BitmapImage>
                        </ImageDrawing.ImageSource>
                    </ImageDrawing>
                </DrawingBrush.Drawing>
            </DrawingBrush>
        </sap:ActivityDesigner.Icon>
     </sap:ActivityDesigner>


    The Build Template, hosting this activity, will requre the following addition to it’s Arguments list:

    image

    as well as a couple of extra entries in the metadata:

    image

    After the activity was build and checked in to the CustomActivities location (see the previous post) I was able to configure new values in the build definition:

    image

    Notice the “Svn arguments” parameter that provides a command line template.

    In the build definition metadata I’ve configured only 2 parameters to appear during the build submission (SvnPath and SvnCredentials) so they can be configured in both places (during the editing and the submission), but the rest of the parameters are configured to appear only during the build editing step. This allows any developer to provide his own “patch” source location and his own credentials during the build submission. If your security model doesn’t allow this – make sure to modify the metadata section accordingly.

    This is it for now – I’ll talk about the whole credentials mystery in the next post.

    Posted in ALM, C#, Continous Integration, Source Control, TFS, Tutorials, Workflows | 1 Comment »